
How to get an AI API key (Claude / ChatGPT)
Create a key on the Anthropic (Claude) or OpenAI (ChatGPT) API platform, add credit, set a spending cap, then paste it into your dashboard and test it. Pick either one. Step by step, with screenshots.
The AI features in your dashboard (AI blog writing, AI support auto-replies, the dashboard AI assistant, the SEO blueprint, the ad assistant and one-click page translation) all need an "AI key" first. You get the key from the AI company, and usage is billed straight to your own AI account. We don't resell it or add a markup.
Pick either Anthropic (Claude) or OpenAI (ChatGPT) and follow that section below.
Note: a Claude Pro or ChatGPT Plus subscription doesn't work here. Those are for chatting on their own websites. What you need is a key from their API platform, which is prepaid and pay-as-you-go. It's a separate bill, so you add credit separately.
Choose a provider
| Anthropic (Claude) | OpenAI (ChatGPT) | |
|---|---|---|
| Where to sign up | platform.claude.com | platform.openai.com |
| What the key looks like | sk-ant-... |
sk-proj-... |
| Minimum top-up | $5 | $5 |
Not sure? Either works well. If you already have an OpenAI account, OpenAI is the quickest. You can also add both and switch between them in the dashboard.
Option 1: Get an Anthropic (Claude) key
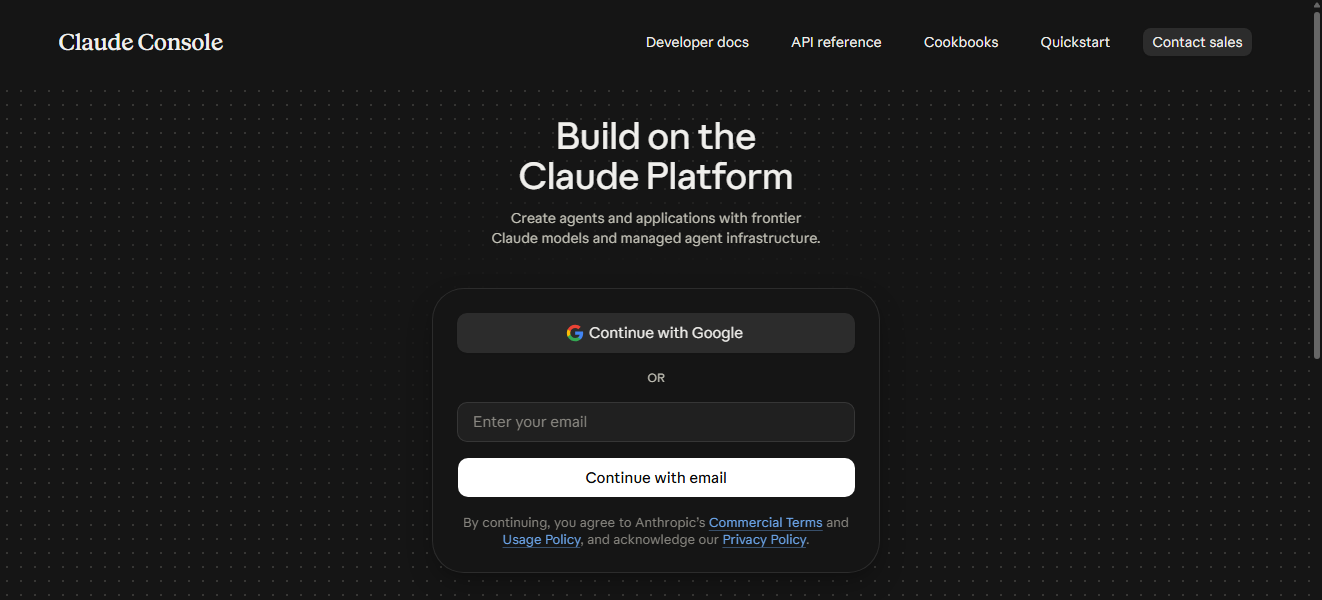
Step 1: Sign in to the Claude Console
Open platform.claude.com (the old address, console.anthropic.com, redirects here) and sign in with Google or your email. The first time, it asks for your name and what you'll use it for. Answer as you like.
Step 2: Add credit first
Open platform.claude.com/settings/billing (left menu: "Spend & usage → Billing") and click "Buy credits" to add a card and top up (minimum $5; $5–10 lasts a long time).
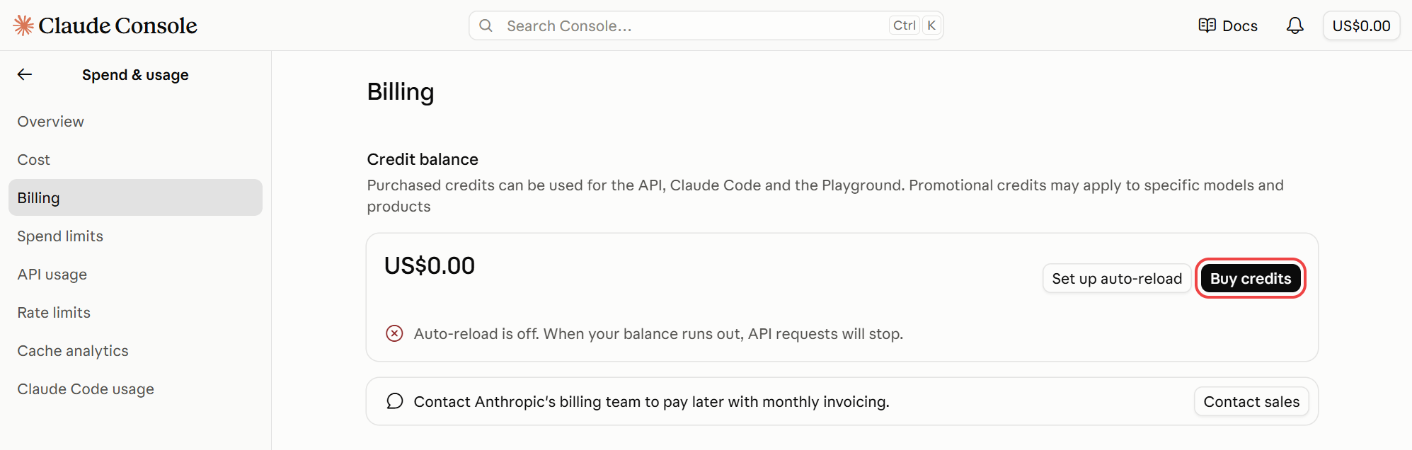
- Without credit you can still create a key, but every call will fail. "Test key" in your dashboard will report insufficient credit
- Leave "Set up auto-reload" off for now. With it off, the amount you top up is your hard cap: when it runs out, calls stop
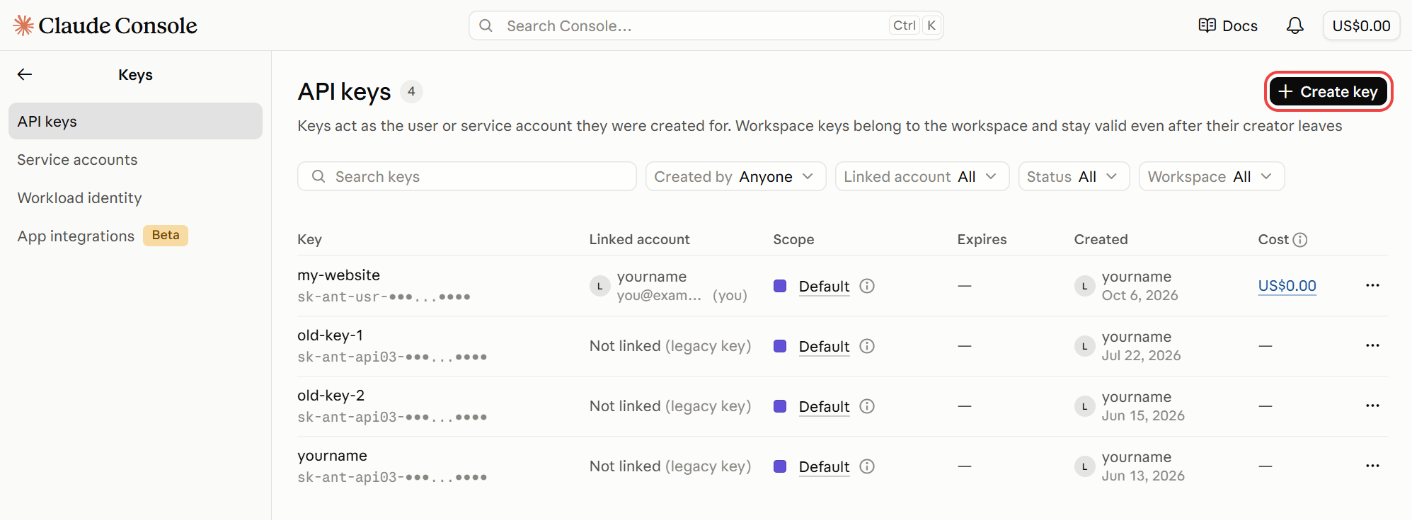
Step 3: Click "Create key"
Open platform.claude.com/settings/keys (left menu: "Keys → API keys") and click "+ Create key" at the top right.
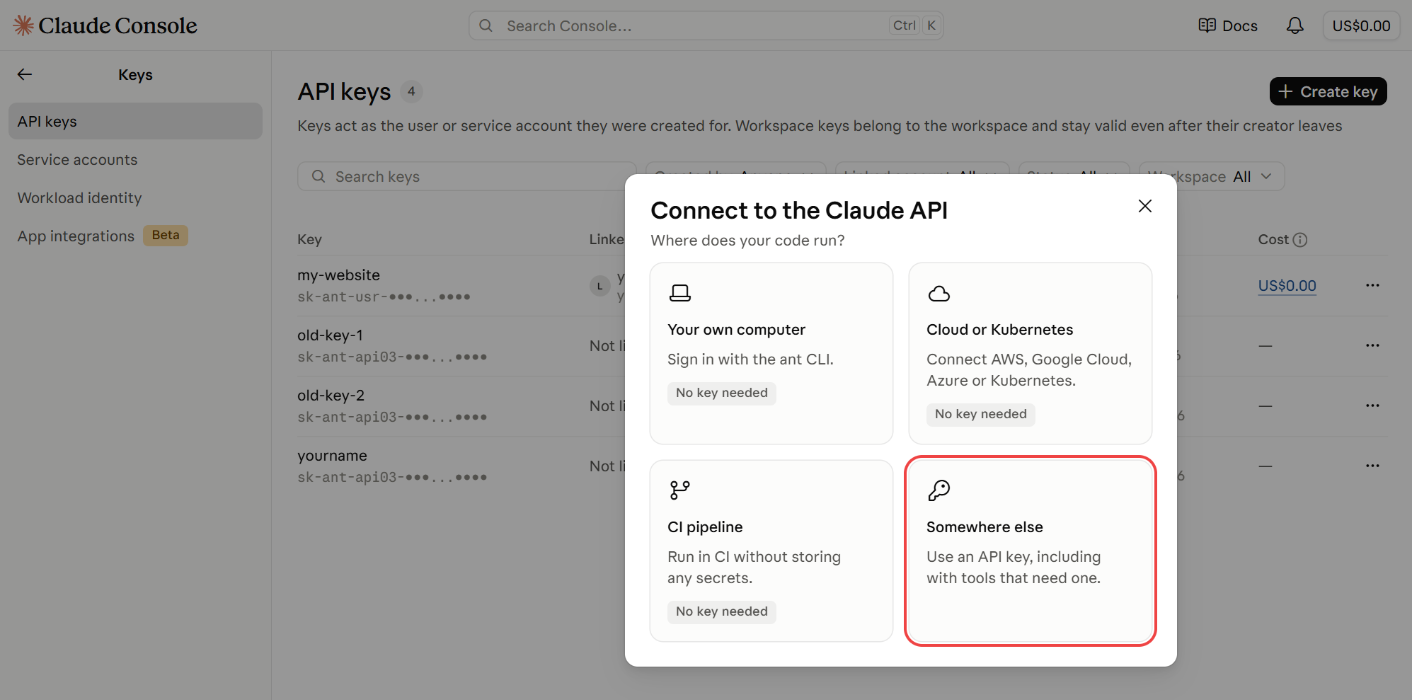
Step 4: Choose "Somewhere else"
When it asks "Where does your code run?", choose "Somewhere else" (use an API key) at the bottom right. The other three options are for developers working on their own computer or in the cloud; your website doesn't need them.
Step 5: Name it, set Expires to "Never", create and copy
- Name: something you'll recognize, e.g.
My website - Expires: 🚨 change this to "Never". The default is 30 days. If you keep it, every AI feature on your website will suddenly stop working a month later
- Linked account and Scope: keep the defaults
- Click "Create key". A key starting with
sk-ant-appears. Copy it
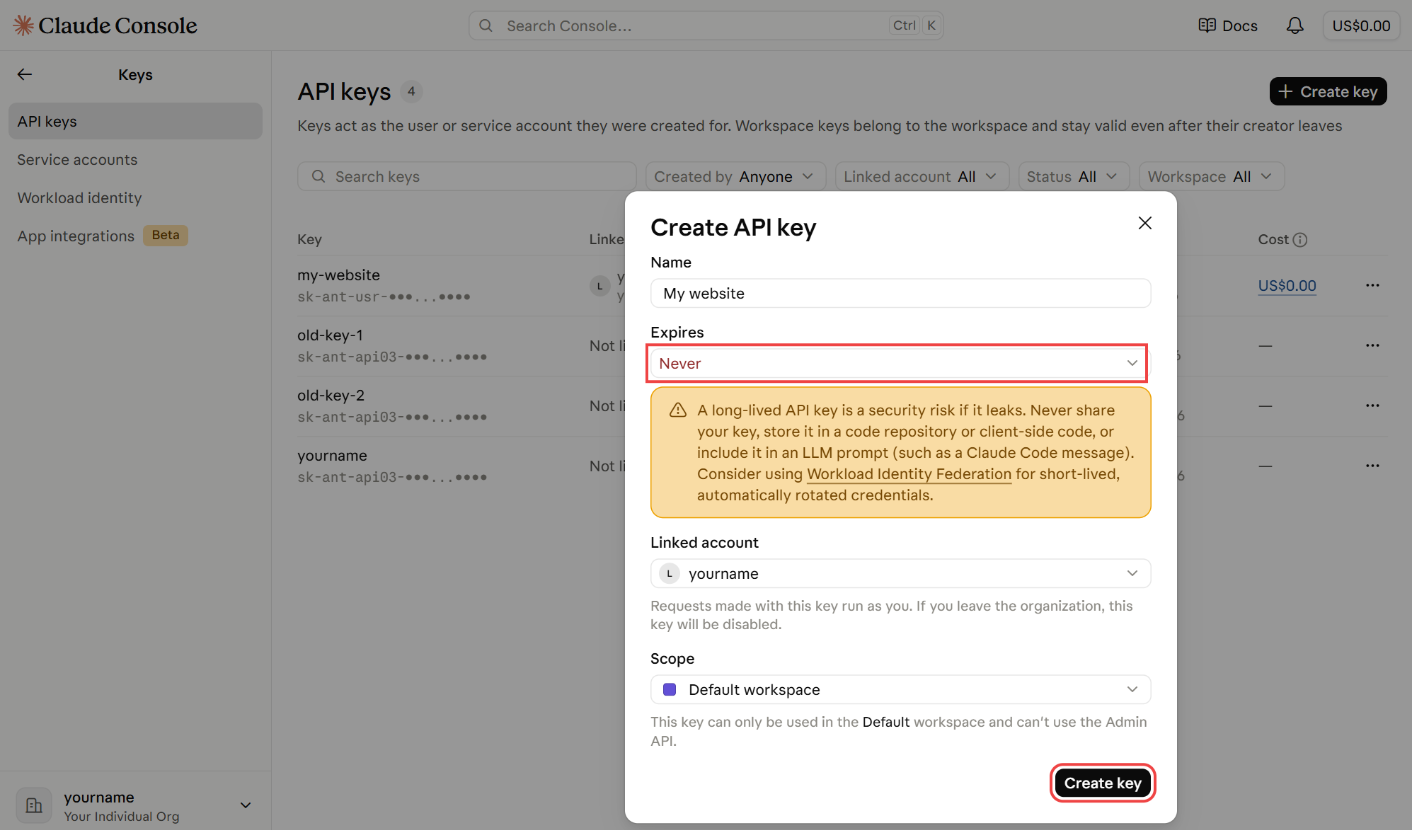
Choosing "Never" shows a yellow security notice, which simply means "don't let the key leak". Your key is stored only on your website's server and never appears on your public pages, so go ahead and create it.
🚨 The key is shown only once. After you close the dialog you can't see it again; you'd have to delete it and create a new one. Paste it somewhere safe, or straight into your dashboard.
Step 6 (recommended): Set a monthly spend limit
Open platform.claude.com/settings/spend-limits (left menu: "Spend & usage → Spend limits"):
- "Change limit": set a monthly spend limit. Once it's reached, calls stop for the rest of the month
- "Add notification": get an email when spending approaches an amount you choose
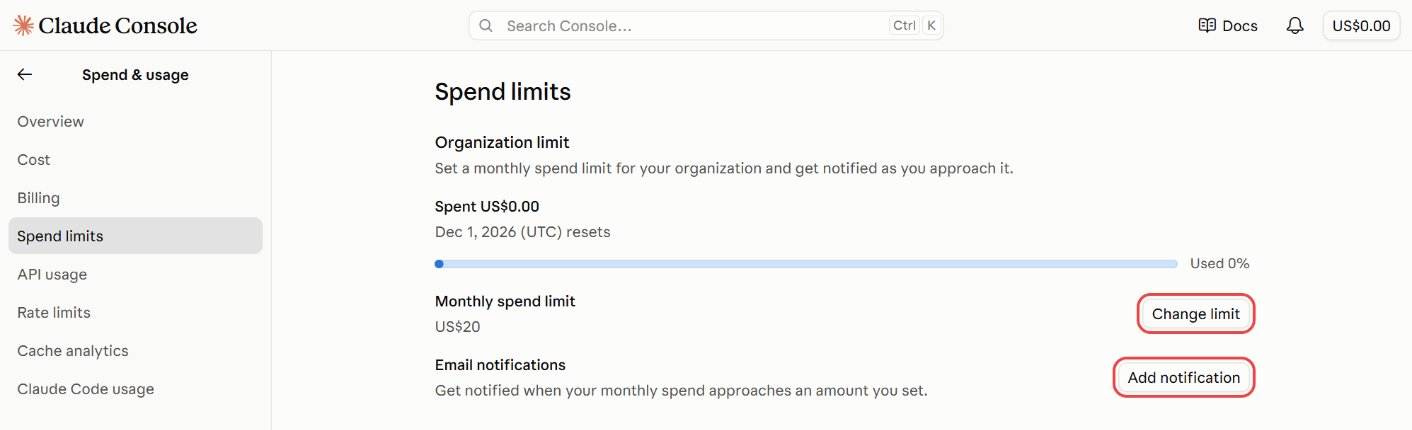
Then skip to "Paste it into your dashboard and test" near the end of this page.
Option 2: Get an OpenAI (ChatGPT) key
Step 1: Sign in to the OpenAI API platform
Open platform.openai.com and sign in with your OpenAI account (the same login as ChatGPT, but a separate bill). The first time, it asks you to create an organization; any name is fine.
Step 2: Create a key
Click API Keys in the left menu (or open platform.openai.com/api-keys) and click Create new secret key at the top right.
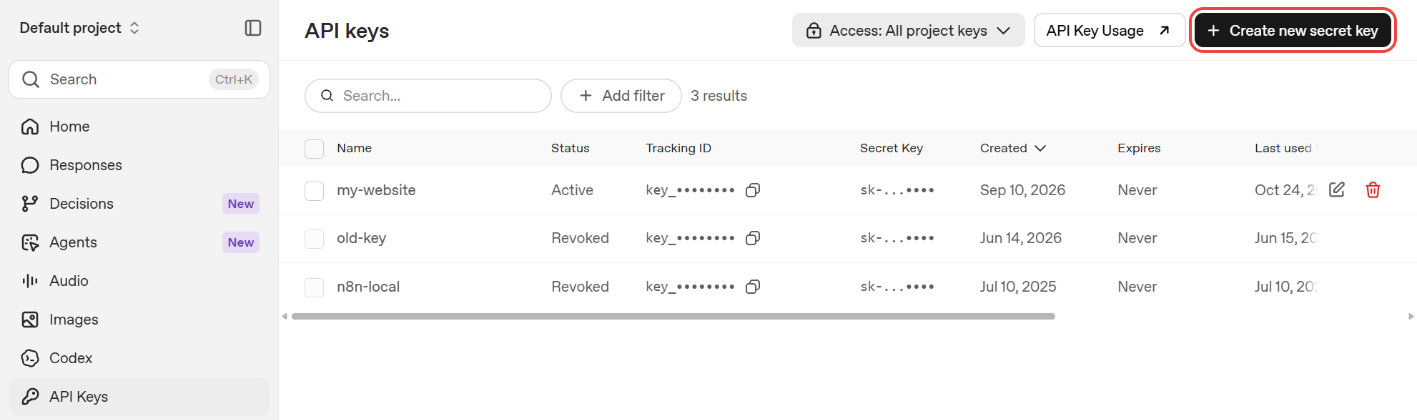
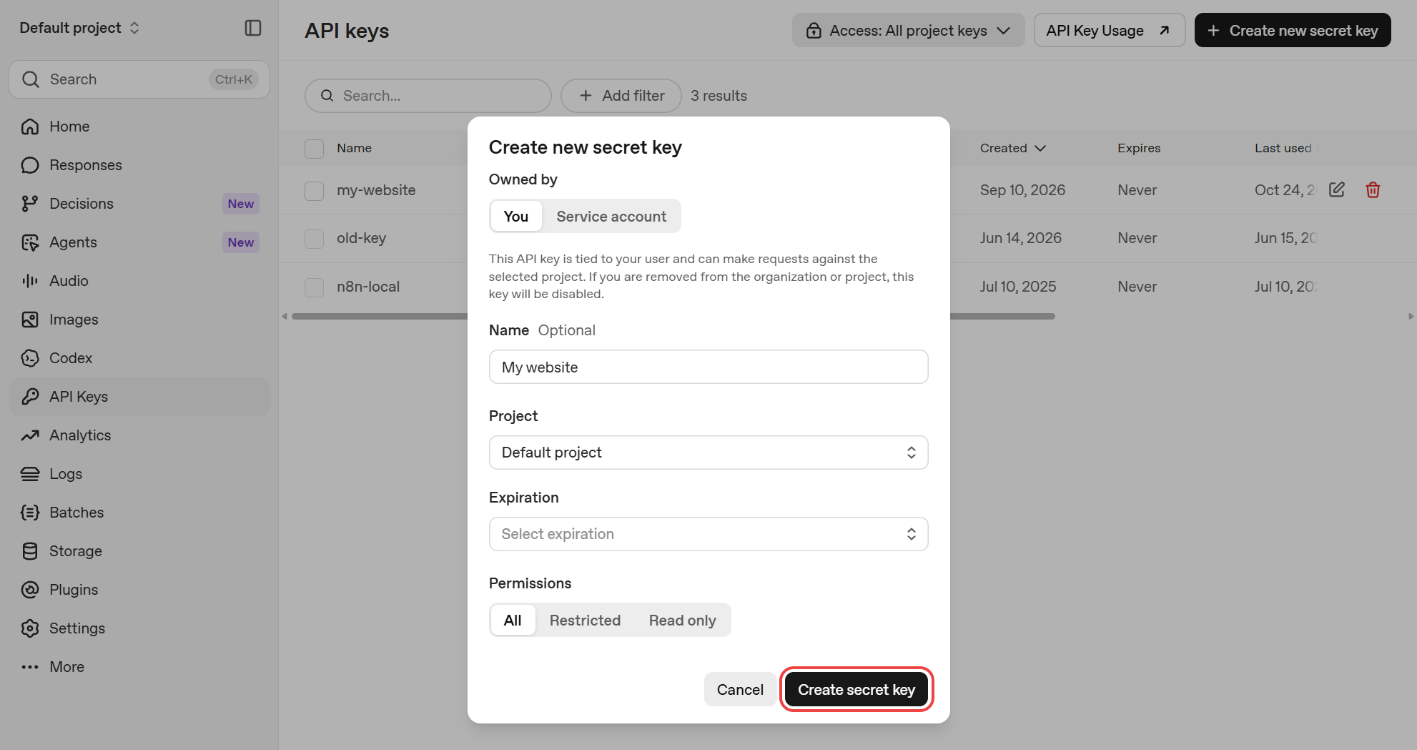
In the dialog:
- Owned by: choose You
- Name: something you'll recognize, e.g.
My website - Project:
Default projectis fine. To track this website's spending separately, create a dedicated project first - Permissions: choose All (if you choose Restricted, at least give write access to Model capabilities)
- Click Create secret key and copy the key that starts with
sk-proj-
🚨 The key is shown only once. After you close the dialog you can't see it again; you'd have to delete it and create a new one. If you're asked to choose between a project key and a user key, choose the project key (
sk-proj-). OpenAI marks user keys as legacy.
Step 3: Add credit
Go to Settings → Billing and click Buy credits to add a card and top up (minimum $5).
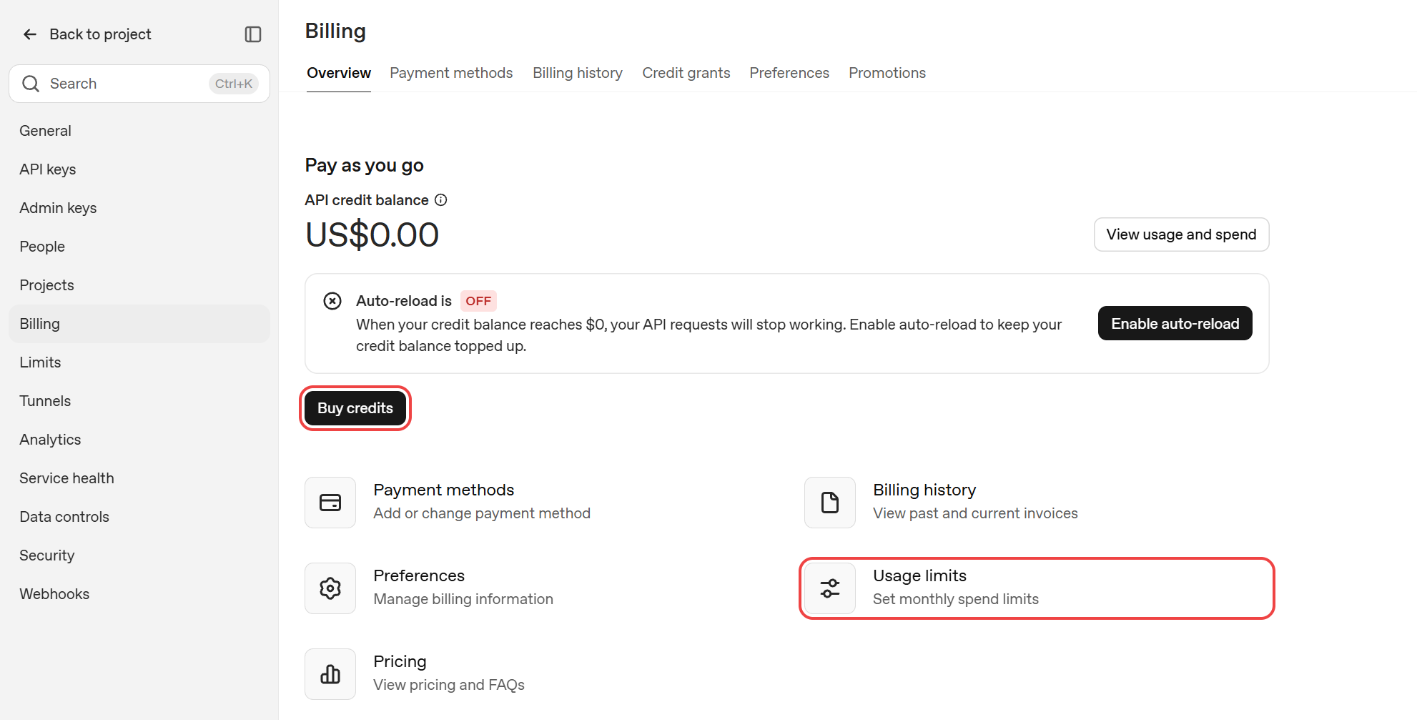
- Leave auto-reload off for now. With it off, the amount you top up is your hard cap: when it runs out, calls stop and nothing more is charged
- With a $0 balance, "Test key" in your dashboard will report insufficient credit
Step 4 (recommended): Set spending alerts
Under Settings → Limits you can set a monthly spend limit (Edit spend limit) and email alerts at certain amounts (Add alert).
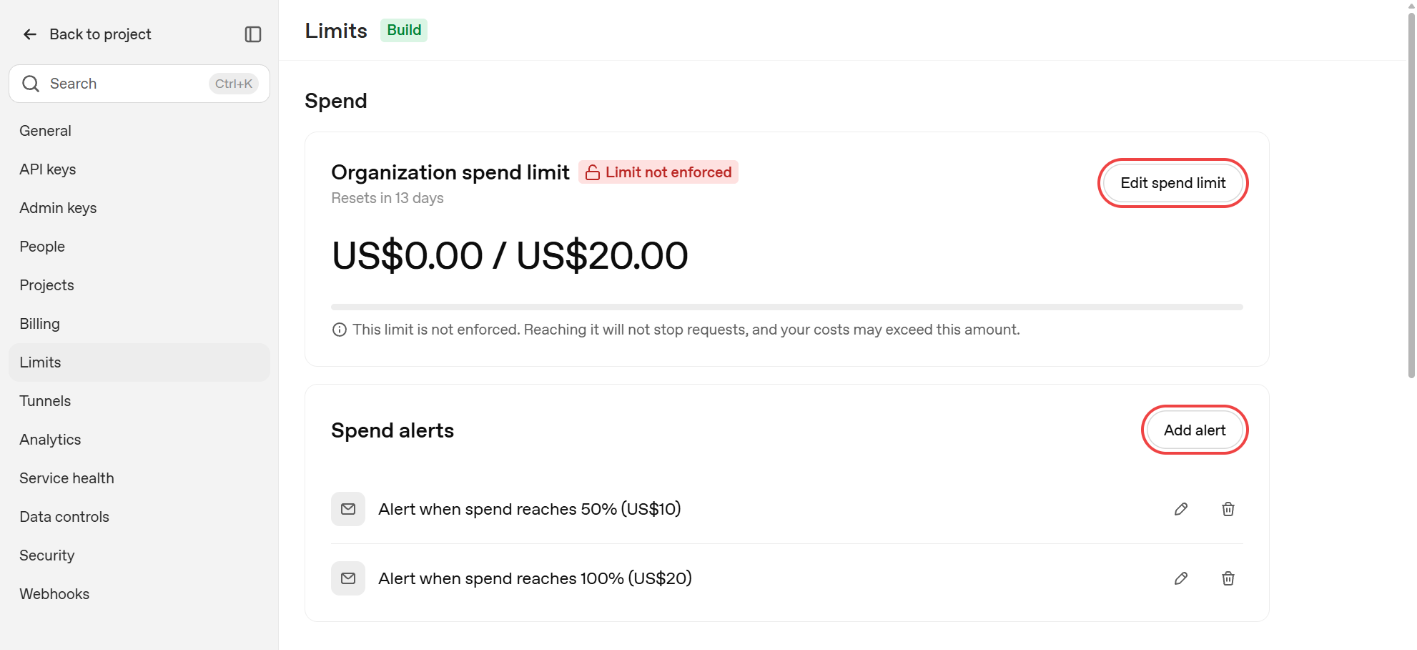
OpenAI labels this limit "not enforced": it only warns you and doesn't block calls. What actually stops spending is leaving auto-reload off, as in the previous step.
Paste it into your dashboard and test
Back in your dashboard, go to "Settings → AI writing key" in the left menu:
- Which AI provider to use: choose the provider you just signed up with
- API Key: paste the key you copied
- Click "Save settings", then "Test key"
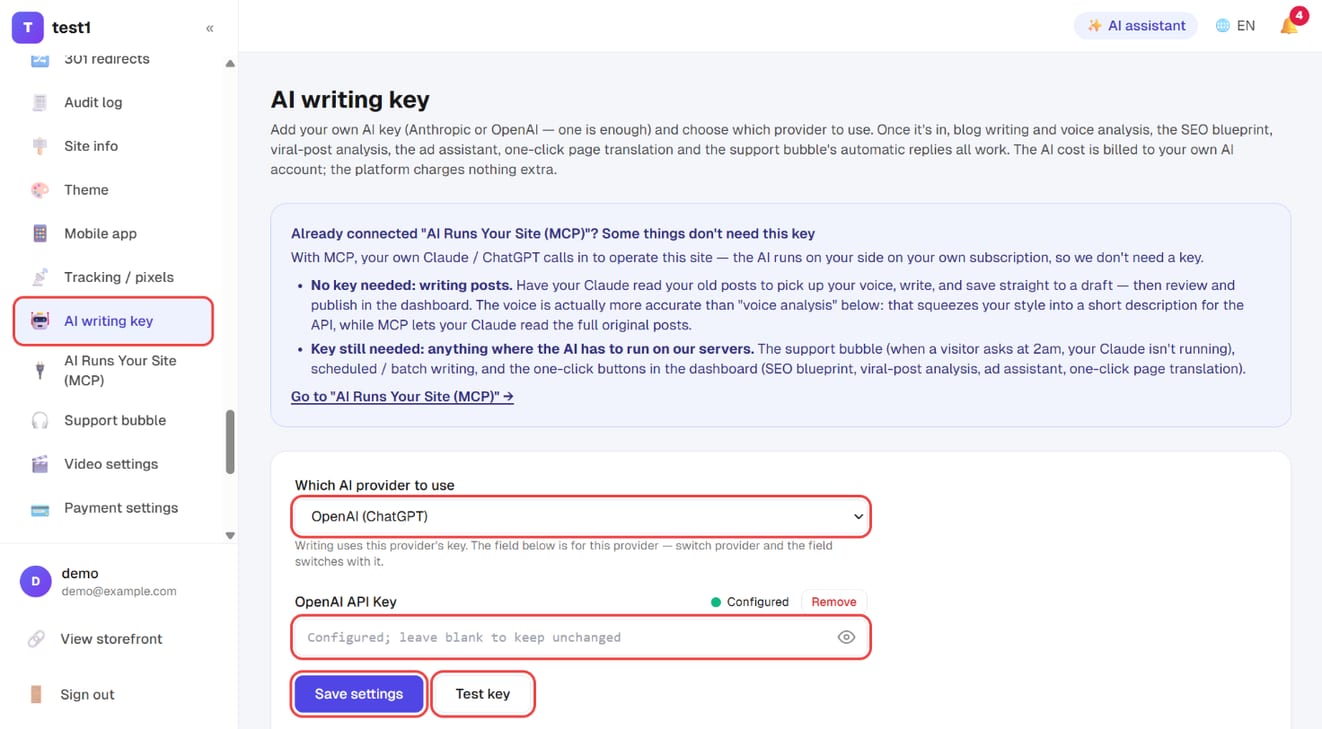
If the test passes, you're done: every AI feature is ready to use. The key is stored only on the server and never appears on your public site or in the page source.
FAQ
"Test key" fails with insufficient credit / quota? The account hasn't been topped up yet, or the payment hasn't landed (usually a few minutes after paying). Check that the balance on the provider's Billing page is above zero.
"Test key" says the key is invalid?
Usually the key was copied incompletely or has extra spaces. Also check "Which AI provider to use": sk-ant- keys need Anthropic, sk-proj- keys need OpenAI.
I have ChatGPT Plus / Claude Pro. Can I skip the top-up? No, subscriptions and the API are billed separately. On the advanced plan you can use "AI Runs Your Site (MCP)" to let your subscription work in your dashboard directly. Features that run on our servers, such as support auto-replies and scheduled writing, still need an API key.
How much will it cost? It depends on the model and the amount of text, and providers change prices often, so check their Billing / Usage pages. Start with $5–10 and auto-reload off, then decide after you see your real usage.
What if my key leaks? Delete (revoke) that key on the provider's API keys page, create a new one and paste it into your dashboard. The old key stops working immediately.