
Launch & first-time setup
The first four things to do after your site goes live: site name, contact details, domain, and the essential legal pages.
Once your site is live you get a dedicated address (for example yourname.example.com). Courses, payments, and email are all built in — there is nothing extra to install.
This page walks you through the shortest path from a blank site to taking your first payment. Every step comes with a screenshot of the dashboard; the red boxes show exactly where to click.
Set up your site, step by step
Step 1: Open the "Finish these before you launch" checklist
Sign in to your dashboard. At the top of the first screen, "Dashboard overview", there is a "Finish these before you launch" card listing the setup you haven't done yet. Each item's "Set up →" link takes you straight to the right page.
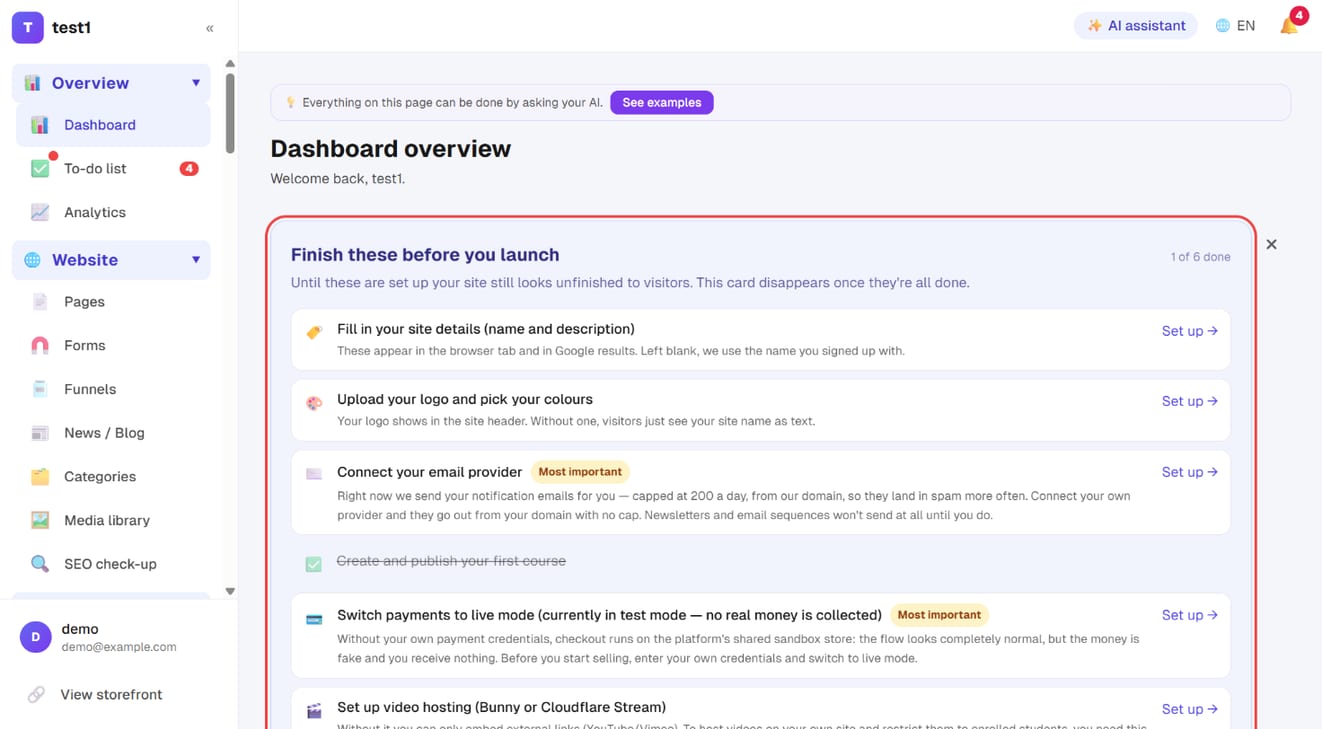
The card disappears by itself once everything is done. You can also close it for now with the ✕ in the top-right corner.
Step 2: Fill in your site title and description
In the left menu, click "Settings → Site info":
- Site title (site name): shown in browser tabs and as the title in Google search results
- Site description (SEO): 60–150 characters works best; search engines show it under your title
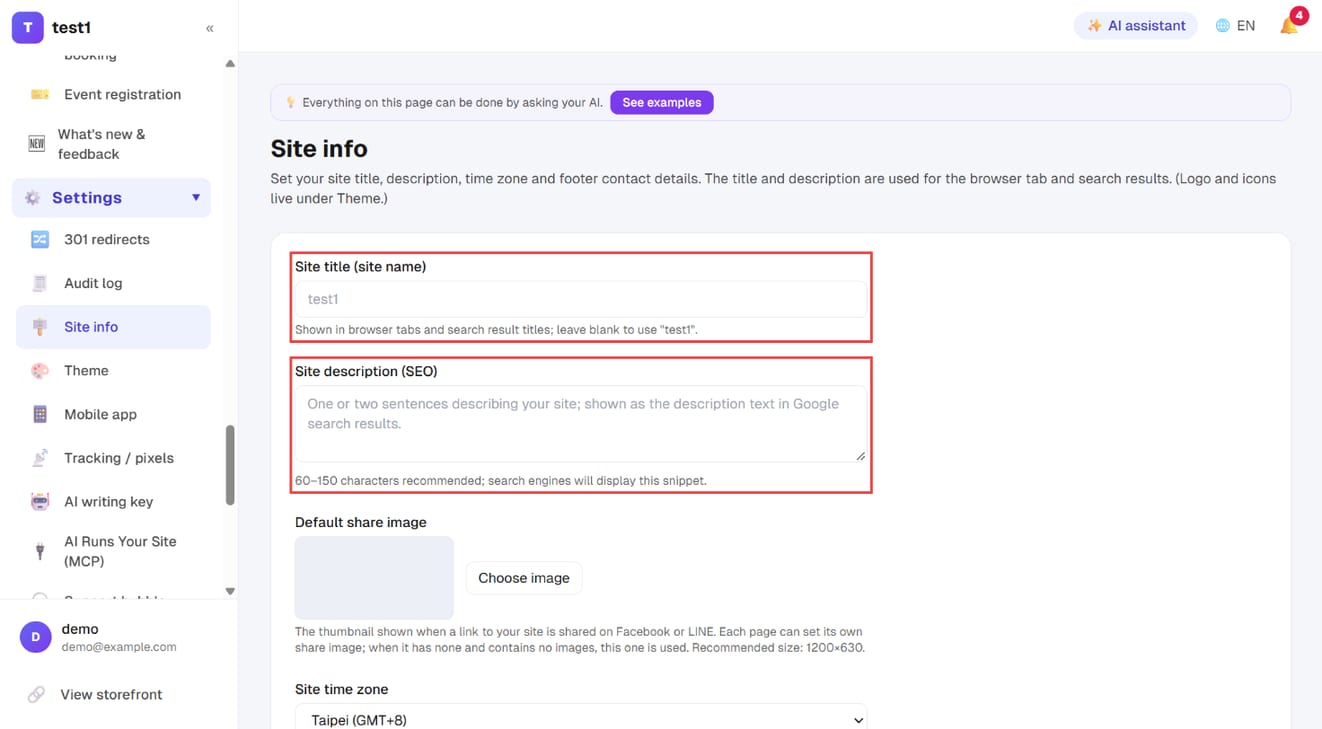
The same page also has a "Default share image" (the thumbnail when your link is shared on Facebook, LINE and so on — 1200×630 is recommended) and the "Site time zone". Set the time zone to where you run your business; course schedules, emails and reports all follow it.
Step 3: Fill in your footer and contact details
Scroll down the same page to "Footer & contact info". Fill in at least one way to reach you (email, phone or LINE), then click "Save settings" at the bottom.
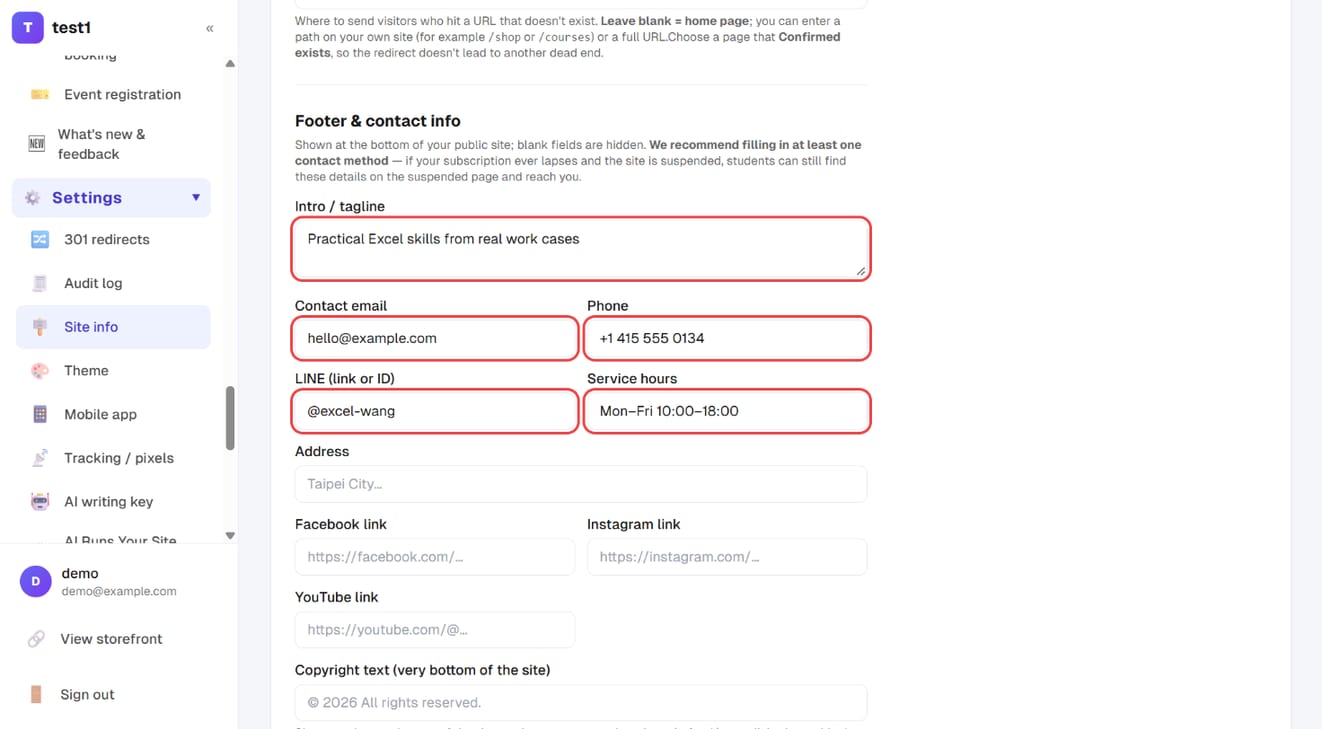
Blank fields are simply hidden on your public site.
💡 Contact details are not optional. Consumer protection rules generally require online sellers to disclose business information, and your payment provider will review this page when approving your account.
Step 4: Upload your logo and browser icon
In the left menu, click "Settings → Theme":
- Click "Upload logo": 300–600px wide works best. By default the white background is removed automatically; untick the option if your logo is meant to sit on white
- Click "Upload icon": the small icon in the browser tab (favicon). Use a square image
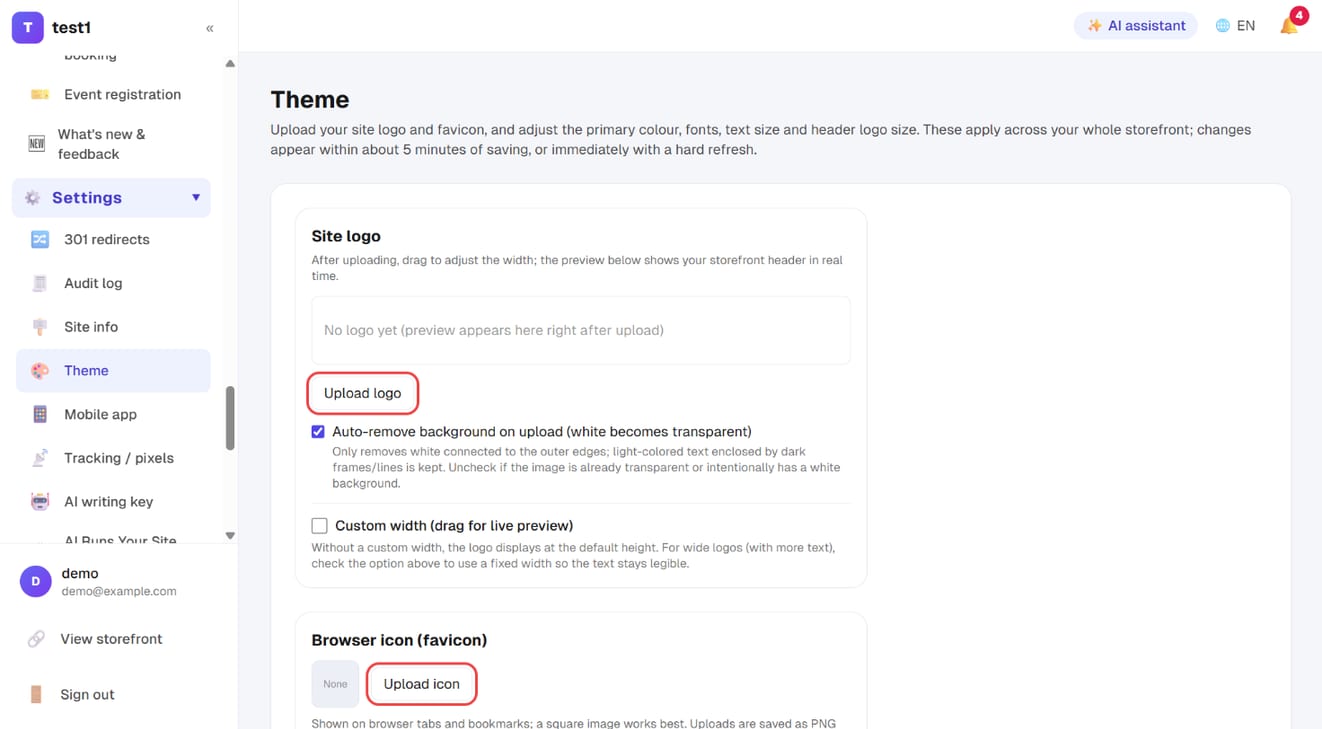
Further down the same page you can pick your primary colour, fonts and text size. Changes appear on your site within about 5 minutes, or immediately with a hard refresh.
Step 5: Review your three legal pages
In the left menu, click "Website → Pages". The three pages tagged "Required" — Privacy policy, Returns & refunds and Terms of service — were created automatically with your site and always appear in the footer. They can't be deleted, but you can click "Edit" to change the content or "Rename" to change the title.
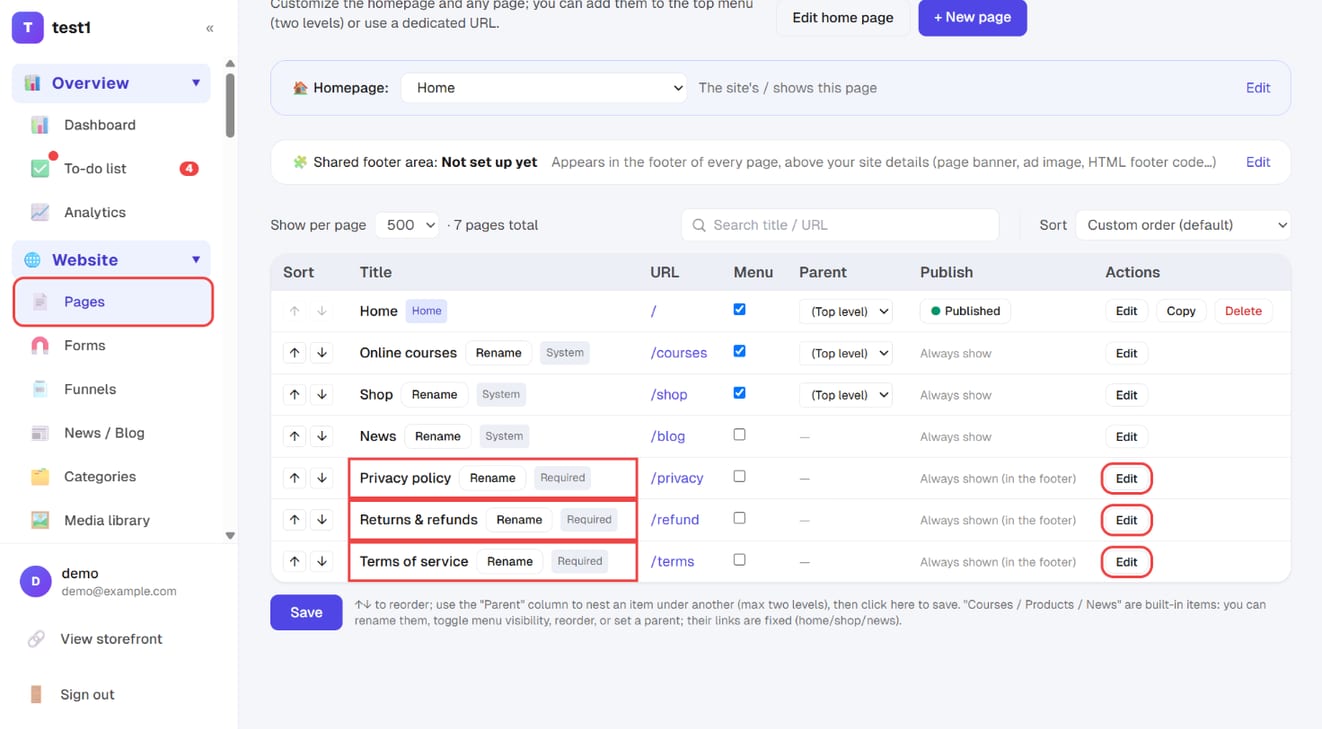
These templates already handle a common point of confusion around cancellation and refund rights:
| Product type | Cooling-off / return window |
|---|---|
| Online course (digital content) | Often exempt from a mandatory return window |
| Physical goods | Return window typically applies |
You can use the templates as-is, but please read them through and edit them to match your actual policy — unclear refund terms are the single most common source of customer complaints in the course business.
Step 6: Set up payments, email and your domain
The remaining three items each have their own step-by-step guide:
- Payments: until you connect a payment method, checkout runs on a test store and no real money is collected. Payment providers (Stripe, PayPal, and local gateways) require you to apply for a merchant account first, and approval can take several business days — we recommend applying right at the start. See "Payment setup"
- Email: connect your own email provider so notifications are sent from your own domain and are less likely to land in spam. See "Email setup"
- Domain (optional): want an address like
course.yourcompany.com? See "Custom domain"