Video settings & media library
Where to host your videos (Bunny / YouTube / Vimeo), how to set up the anti-piracy watermark, and how to use the media library.
Video is the most expensive asset on a course site — and the one you most want to protect. This page covers two things: where your videos live (Settings → Video) and where your images and files live (Site → Media library).
Three video sources
Each lesson picks its own source, and you can mix them freely within one course.
| Source | Best for | Protection |
|---|---|---|
| Bunny (upload a file) | Paid courses you actually sell | Strongest. Videos are tied to your domain and only play on your site |
| YouTube (paste a URL) | Free lessons, previews, trailers | Weak. Even "unlisted" videos travel once someone has the link |
| Vimeo (paste a URL) | People already on Vimeo | Weak on the free tier; Plus/Pro and up can lock to your domain |
If you sell one or two low-priced courses, unlisted YouTube is honestly fine. What you really need to guard against is a whole course being repackaged and resold — that's where Bunny earns its keep.
Setting up Bunny (required for uploads)
Bunny is your own account. You pay Bunny directly for hosting; the platform never touches or marks up that bill. Work through all five steps below in order — step 5 is the acceptance check, don't skip it.
Step 1 — Create the video library
Sign up at bunny.net → Stream in the sidebar → Add Video Library.
You'll be asked which replication regions to use. Pick the ones nearest your students. Skipping the region closest to your audience means every playback pulls the file across an ocean, and students see a lot of buffering.
Step 2 — Copy two values into Settings → Video
Open the library → the API tab:
| Name in Bunny | Our field | What it looks like |
|---|---|---|
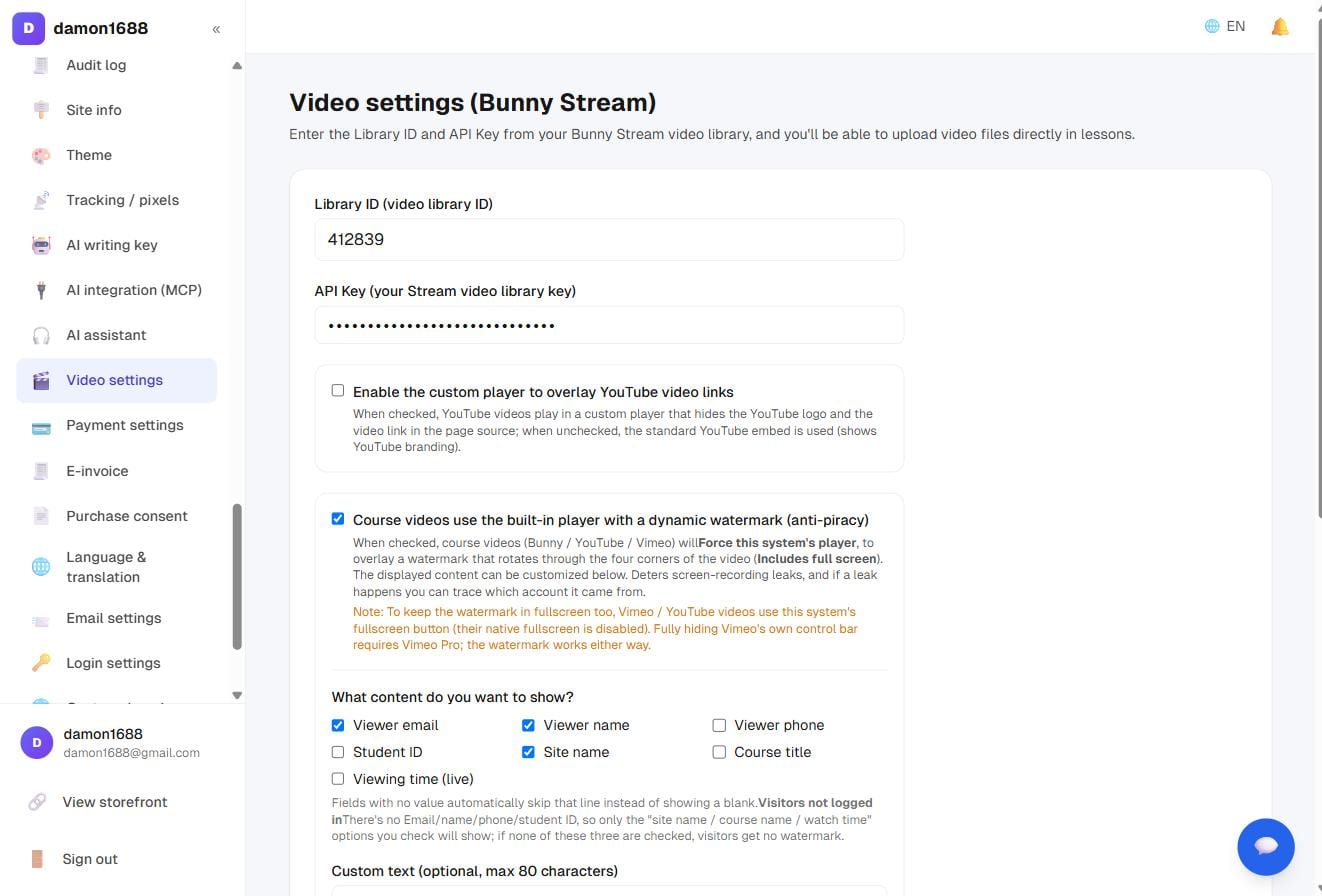
| Video Library ID | Library ID | A number, e.g. 123456 |
| API Key | API key | A long alphanumeric string |
Library ID only accepts digits. It is the numeric ID of the video library — not your email, not the library's name. Paste anything else and the field turns red and refuses to save, because a wrong value here doesn't fail until the day you try to upload, and the error you'd get from Bunny wouldn't tell you why.
About the API key field: once a key is saved we never send it back to your browser, so the box shows Configured and stays empty. Leave it empty and your key is kept as-is — you only type in it when you want to replace the key. To clear it entirely, use Remove next to the field. (Payment and e-invoice credentials work the same way.)
Step 3 — The Security tab (the easiest one to get wrong)
Two of these settings will stop your videos playing on this platform if you get them wrong. Bunny gives you no useful error for either — the video simply never starts.
| Setting | Set it to | What happens otherwise |
|---|---|---|
| Allowed Referrers | Your domains — both your custom domain and yoursubdomain.platformdomain |
Blank lets anyone embed your videos on their own site. Wrong, and your own site can't play them either |
| Block direct URL file access | On (recommended) | Off means the raw file URL works for anyone who finds it. On is safe for us: our player embeds your videos, so the referer is always sent |
| Embed view token authentication | Off — required | 🚨 On means the embed only loads with a signed token. This platform doesn't sign Bunny tokens, so every video goes blank |
| CDN token authentication | Off — required | Same reason |
| MediaCage Basic DRM | Your call — see below | On: strongest protection against downloads. Off: no protection gain for us, since watch tracking doesn't work either way |
About DRM, and what it costs you
MediaCage Basic is free and encrypts your video files on delivery, so they can't simply be downloaded. The trade-off Bunny states plainly: with it on, your videos only play inside Bunny's own embed, and MP4 fallback is disabled.
What that means here: this platform can't measure watch percentage for Bunny videos. We can't attach our own player, and Bunny's embed doesn't report playback position back to us. We tested this with DRM switched off as well — it made no difference, so turning DRM off buys you nothing on this platform. If you need watch percentages, host those particular courses on Vimeo; if you need the strongest protection against re-distribution, keep DRM on and accept that those lessons can't be measured.
Step 4 — The Encoding tab (this page decides your monthly bill)
- Resolutions: 360p / 480p / 720p / 1080p is plenty. Leave 2160p (4K) off — it multiplies both encoding and bandwidth costs, and online courses have no use for it
- Keep original files: off. Keeping the masters means paying storage on them forever
- MP4 Fallback: off. It hands out a URL that downloads the whole video in one go, which defeats the point of protecting it. (With DRM on, Bunny disables this for you anyway)
Step 5 — Confirm it actually works (repeat after every settings change)
Upload a short test video to any lesson, then open that lesson as the site owner and press play.
If the picture never appears, the cause is almost always the Security tab in step 3 — Allowed Referrers missing your domain, or one of the two token authentication switches left on. Bunny gives you no useful error for these; the video simply doesn't start.
Once that's set up, choosing "Bunny (upload a file)" in a lesson lets you upload directly. Transcoding, thumbnails and the lesson's video length are all filled in automatically — you don't have to wait around for it.
Already uploaded something? In the lesson's video picker, switch to Choose an existing video instead of uploading it twice.
What watch-time tracking requires
The course setting Track watch percentage tells you how much of a course a student actually watched, so you can decide a refund request on facts instead of guesswork. It never decides anything for you — nothing is approved or declined automatically; the threshold you set only controls when the figure turns red on the student's page. For the number to mean anything, two conditions must hold:
- Every lesson has a video length (uploads fill this in for you)
- Every lesson comes from a source we can measure. What each option can do:
| Source | Watch percentage | Notes |
|---|---|---|
| Vimeo | ✅ Measured | Set the video's privacy to allow embedding only on your own domain, so the figure reflects what was watched on your site |
| YouTube | ✅ Measured, with a caveat | We count what was watched on your site. The same video is reachable on YouTube, so the real figure can be higher than what you see — the error runs in the student's favour, never against them |
| Bunny (upload a file) | ❌ Not measured | With DRM enabled, Bunny videos only play in Bunny's own player, and it doesn't report playback position back to us |
Pick the source that fits what you need: Bunny gives you the strongest protection against re-distribution, Vimeo and YouTube let you see watch percentages. The student page names any lessons that are blocking the calculation.
If any condition fails, the student detail page won't hand you a plausible-looking number — it says it can't make a determination and lists which lessons are blocking it. That's deliberate: an incomplete percentage used to deny a refund is worse than no percentage at all.
The maths is seconds actually watched ÷ total video length of every lesson in the course. Sections skipped by seeking don't count, and rewatching the same section ten times still counts once.
The moving watermark
Tick Use the built-in player and show a moving watermark on course videos and a small caption is drawn over the picture, hopping to a different corner every few seconds — including in full screen.
- What to show: email, name, phone, student ID, site name, course name, timestamp. Fields with no value are skipped rather than left blank
- Custom text: variables work here, e.g.
Licensed to {name} · do not share - Opacity: higher is harder to remove but more distracting. 30–50% suits most people
- Rotation interval: how often it jumps corners. Under 10 seconds makes cropping impractical
- There's a live preview underneath, so you don't have to open a real video to test it
The point is deterrence and traceability: if a video does leak, the leaker's account is written across the picture.
⚠️ Two side effects worth knowing:
- To keep the watermark in full screen, Vimeo and YouTube videos switch to our full-screen button (their native one is disabled)
- Logged-out visitors have no email, name, phone or student ID, so they only ever see site name / course name / timestamp. Untick all three and preview viewers get no watermark at all
Hiding YouTube branding
A separate option: Use the custom player to hide YouTube links. With it on, YouTube videos play in our own player, the YouTube logo is hidden and the video URL doesn't appear in the page source. With it off you get the standard YouTube embed, branding and "Watch on YouTube" included.
The media library
Site → Media library is the shared file cabinet for the whole site: course covers, post images, page assets, downloadable handouts.
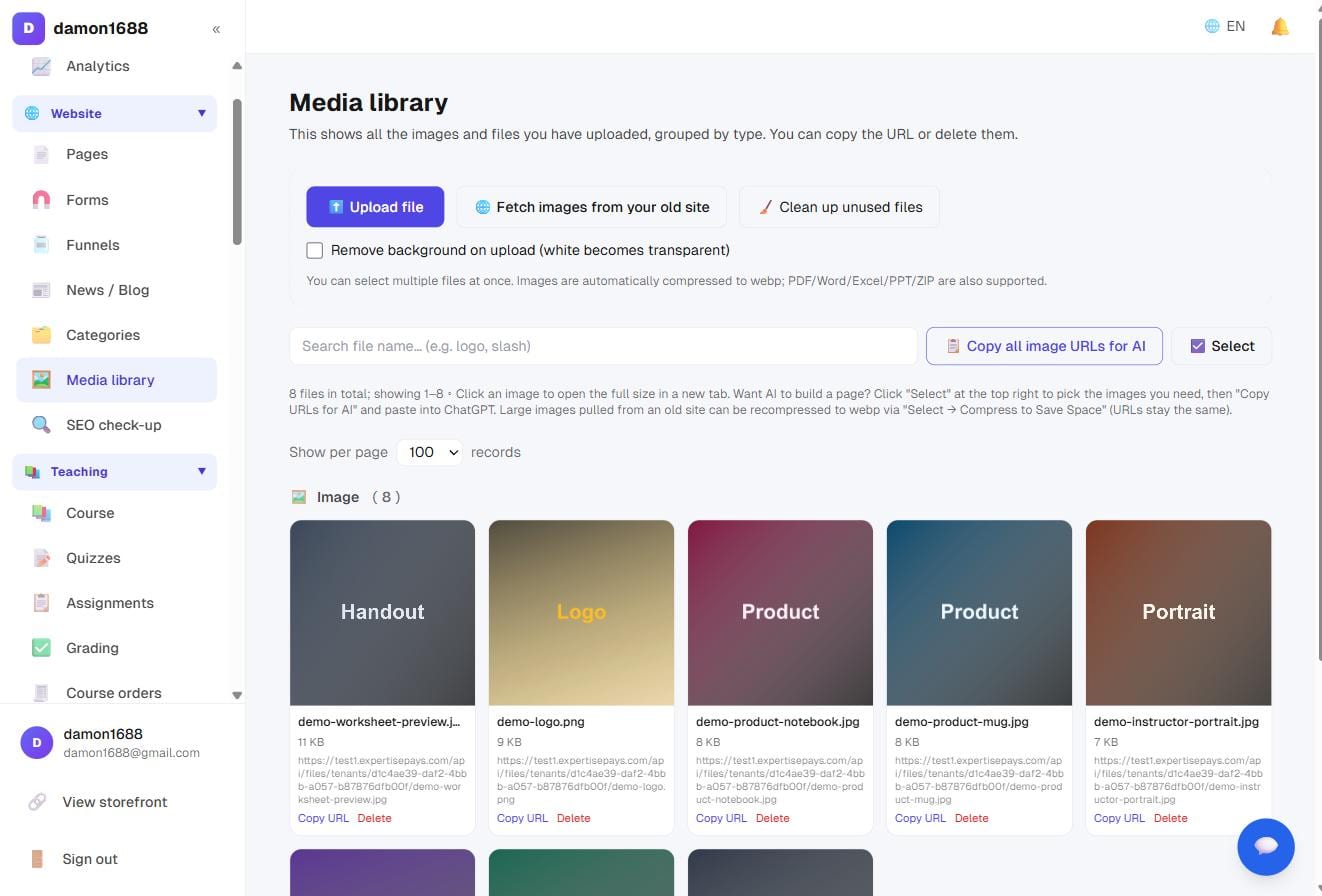
- Accepted files: images, PDF, Word, Excel, PowerPoint, zip, txt, csv
- Remove background on upload: turns a white background transparent — handy for logos and product cut-outs
- Automatic compression: images are converted to WebP on upload, no manual conversion needed
- Copy URL: every file has a direct URL you can drop into a post or page
- Import from your old site: paste an old site's URL and pull that page's images in as a batch, instead of saving and re-uploading one by one
- Clean up unused files: lists files no course, post or page refers to, so you can review before deleting
Two time-savers
Copy all image URLs for AI: hit Select top right, tick the images you want, then Copy selected URLs for AI. Paste that into ChatGPT or Claude when asking it to lay out a page and it knows exactly which images exist.
Compress to save space: images dragged over from an old site are often several MB each. Select them and hit 🗜 Compress to re-encode as WebP — the URL doesn't change, so images already embedded in posts keep working.
Storage limit
The dashboard overview has a storage bar at the top showing used vs. limit. It turns amber as you approach it and red once you're over. Run a compression pass first; buy more only if that isn't enough (sold in 5GB units).
FAQ
Who pays for video hosting? You do, directly to Bunny. The platform takes no cut and adds no markup.
I already have everything on YouTube — do I have to re-upload? No. Lessons accept a YouTube URL as-is. Move to Bunny later, when the course is selling well enough to be worth stealing.
Does the watermark hurt the viewing experience? Slightly, on purpose. Around 30% opacity is visible without covering the content — that's usually the right trade.
If I delete an image from the media library, do my posts break? Yes. Check nothing is using it first — the URL points straight at the file.
Can students download the videos? There's no download button. But anything that plays in a browser can, with enough effort, be recorded — which is exactly why the watermark exists.
The player shows a 🟡 "fell back to the built-in player" badge but the video plays fine. Does it matter? Bunny videos now always play in Bunny's built-in player, so that badge just tells you which player you're looking at. Watch-time tracking is not available with it — see the note under "What watch-time tracking requires".
The student detail page says it can't determine the watch percentage. Why? The course contains lessons the system can't measure: it mixes in YouTube videos (deliberately excluded — see above), some lessons have no video length yet, or the videos play in Bunny's built-in player, which doesn't report playback position back to us. The message tells you which lessons are blocking it.
If I change the threshold percentage, does it apply to existing students? The new percentage is used for the comparison, but watch history only starts accumulating from the moment you tick the box. Nothing is recorded while the setting is off, so there's no history to reach back into. Set this up before you start selling.